THE JOURNAL

Our obsession shows no signs of waning. MR PORTER explains how to capture yourself at your very best.
You might have thought-slash-hoped that the general obsession with the selfie would have died down by the time we reached 2017. You’d have been wrong-slash-disappointed. Yes, this crass but enduring behavioural phenomenon continues to go from strength to strength, not just in the eye-wateringly busy feeds of our social media accounts, but also, startlingly, in more august cultural institutions, such as the Saatchi Gallery in London, which launched the very first exhibition of selfies, From Selfie To Self Expression, earlier this year. As part of that venture, members of the public were invited to submit selfies, with the winning entry picked by a panel that included Mr Juergen Teller and Ms Tracey Emin. This prompts two rather unsettling questions. First: is the selfie an art form? (Lord have mercy.) Then: are some selfies better than other selfies? If the Saatchi stunt is anything to go by, well, yes, they are.
Given this, as well as the obvious fact that there are rather more selfies out there than there are people to look at them (in 2016, Google reported that users had uploaded 24 billion selfies to its Photos app – the population of Earth is roughly 7.5 billion), it’s clear that to succeed in this super-competitive era of the selfie, all the tired old tropes and tricks – pouting lips, puffed-up pectorals, hot-dog legs – will no longer do. You don’t need to be an artist to make your own iPhone photos stand out in the wider morass of selfiedom these days, but you do have to have some appreciation of the craft of selfie taking. By which we mean paying a little more attention to both capturing and editing your images. Yes, we’re going to go there. Sorry.
A crucial step towards selfie perfection (beyond shooting yourself in natural light, which is utterly essential; yellow bedroom light is creepy, screen flash is highly unforgiving) is making sure you have some decent photo-editing apps on your phone. The leaders on this front are Snapseed and VSCO. Some users prefer one or the other, but it’s perfectly feasible that you might want to use both. (The former has a slightly more intuitive interface, the latter’s controls give you a more subtle and camera-like result.) Within these apps, it’s best not to use the pre-packaged filters and instead drill down into the more detailed controls. If that seems a bit scary, peruse these hand-holding steps below.
01. Choose your phone

Apple’s iPhone 7 is rightly famed – and heavily marketed – for its main camera, but its FaceTime HD camera offers only 7MP of resolution. In comparison, Google’s Pixel has an 8MP front-facing camera (as well as an in-built SLR-esque lens blur effect, which is exceptionally flattering), as does the Samsung Galaxy S8, while several of Sony’s Xperia phones offer selfie cameras with 13MP resolution.
02. Brightness, contrast and saturation

Almost all phone camera pictures need brightening. Anything remotely dingy will fall under the radar. You should also touch the contrast up a little bit (unless your image has been taken in blazing, direct sunlight). Saturation generally needs to go down a touch. A slight dip in saturation will not only de-redden your face, but give the entire image a more crisp and striking feel.
03. Shadows and highlights

Deepening shadows will make you look particularly moody and mysterious if you have brown eyes, but even if you don’t, darker shadows will make the whole image seem more 3D, and improve the immediate impact of your selfie. Up the highlights when you’re wearing sunglasses or in front of water – it will bring out the reflections in a rather dazzling manner.
04. Sharpening

Don’t overdo this – it’s one of the most obvious signs of heavy retouching. VSCO’s Clarity slider is fantastic, yet overwhelmingly potent. Just a slight nudge will do. Snapseed has a gentler Sharpening slider and a Structure option. Put it up (slightly) and it will make you look more cheekbone-y. Go the other way and it will soften blemishes and wrinkles, but use with caution.
05. Vignette
You may want to apply a vignette to your image. That is, create a darkening effect around the edge of the image, so what’s in the centre pops out a little more. If you do, make sure the outer darkness is very slight and there is no visible ring of shadow around the image. Otherwise it can all look a bit “Frontierland”.
06. The 10 per cent rule
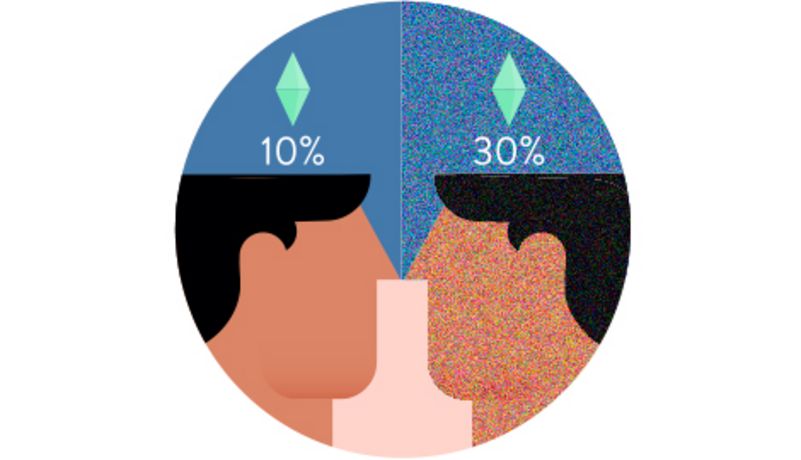
Probably the most important advice of all – don’t apply any controls or sliders with more than 10 per cent intensity. As soon as an effect becomes noticeable, not only does it look a bit desperate, but the photo is essentially no longer of you. In case you didn’t know, social media is all about being real with people, right?
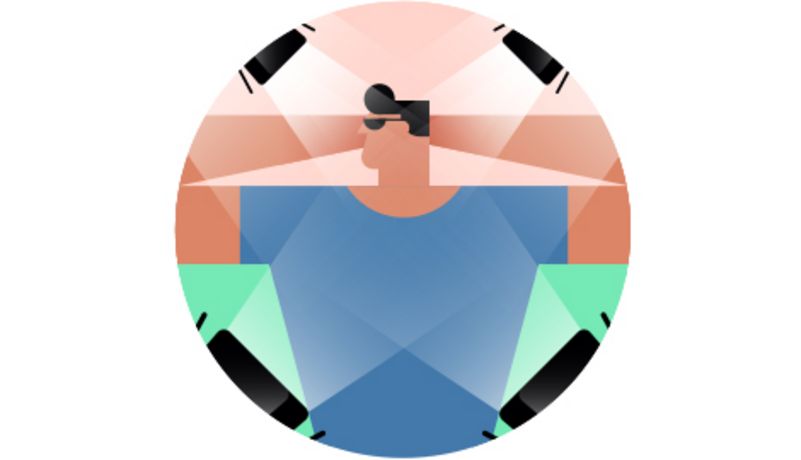
SELFIE ESSENTIALS
Illustrations by Mr Fernando Volken Togni