THE JOURNAL

Follow our experts’ advice and you should be able to do it yourself, rather than pay someone else.
DIY is not, strictly speaking, a dilettante’s sport. For a start, you’re knocking about with some serious hardware. Most of it could take an eye out. Second, you’re knocking it about in your own home. Too zealous, and you risk scalping off the roof. In other words, it is eminently sensible to outsource anything too complicated. “The most important skill is to be aware of your DIY ability and limitations,” says Mr Richard Longmore, managing partner of handyman app Hoppy.
That said, there are some basics that most of us can master. And once you’ve nailed it – literally – you can graduate onto something with more bite. There is a base level of DIY know-how, fewer than 10 tasks, say, that even the unprofessional can be fluent in. We’re talking simple projects that require a little education, concentration and a bit of common sense. Get to grips with these and you can build the world in your image. Sort of. This is your bluffer’s guide to DIY.
Master of the toolbox

The toolbox separates the modern metropolitan from Neanderthal man. The first tools you need to master are the drill and the hammer, says Mr Rohan Luvaglio, founder and CEO of on-demand service app Bizzby. “Get to grips with them and you’re sorted,” he says.
Not that they are child’s play. “There are more than 22 types of hammer and 14 kinds of nail on the market,” says Mr Nevi Nikolova of Fantastic Services. A lightweight model is advised for hammering nails. You can swing quickly while still being precise. A heavier-duty lineman’s hammer is better for brute-force jobs, such as hammering on metal.
A hammer can double as a ruler, too. “If you have to do a lot of repetitive even-space nailing, lay out your hammer and measure the distance you need to cover with a tape measure,” says Mr Nikolova. “Simply mark the distance on the hammer with tape, and you have an instant measuring device.”
Drills are intimidating, so you need to know your enemy. “To prevent the drill bit jamming and to easily clear the dust, drill downwards and pull the drill out regularly,” he says. He also advises using higher speeds for metal and wood and low speed for brick. Brick is prone to cracking, so you need to proceed with more caution. “Assess each job before picking up a tool,” says Mr James Marr, an engineer at Bamboo Bicycle Club in Hackney, east London. “Hammering something is not always the answer.”
Wall mounting

Wall mounting usually means putting up shelves, affixing picture hooks or fastening televisions to walls. They all entail the same basic skill, but Mr Luvaglio says the mounting of televisions is one of the most requested jobs on Bizzby. “Mounting something on a wall requires a good eye,” he says. “Otherwise, you’ll need a spirit level. Knock on the wall and make sure you’re not drilling into something, such as a pipe. You can also use a detector. Grab a pencil, line it up, make some marks. Get your drill, line up and vroom. Depending on the wall type, you’ll need to ensure you’re using the correct screws and Rawlplugs.” Rawlplugs are tubular plastic inserts that are fitted into a wall and expand. They create extra grip for the screw, which ensures the wall will support the weight of your object. “Screw these in and you’re done,” says Mr Luvaglio.
If you need to check the integrity of your plaster, try poking it with a screwdriver to confirm there’s some real wall there. “If you fail to recognise unreliable plaster, you might end up looking for a new TV,” says Mr Nikolova. “And you should never mount your TV onto metal studs, because most are not designed to hold the weight of a TV screen.”
Building furniture

Wrangling with a flatpack is a hackneyed trope of DIY. Yet most people know someone who has been defeated by an Ikea bookcase. Often, the final straw is a falling out with a wayward dowel that sends the whole edifice crashing down. You must conquer the cliché, and Mr Luvaglio insists it’s easy. It’s really a matter of putting compliant shapes together in order. “It normally requires a screwdriver, hammer and patience,” he says. “Drink some camomile tea, do some yoga, meditate and then set your mind to the task at hand. Open the (generally badly illustrated) instructions and proceed as directed. Sometimes it’s useful to go back to front on the instructions, so you know when the end is in sight. It gives you hope.”
The Handy Squad recommends lining up all your tools before you start, checking the instructions against the parts to ensure you’re not missing anything and clearing a wide area before you start doing any self assembly. Halfway through is a bad point to realise you’re going to have to manoeuvre that sofa out of the room. And if the instructions say it’ll take an hour, assume it will take at least two.
Basic plumbing
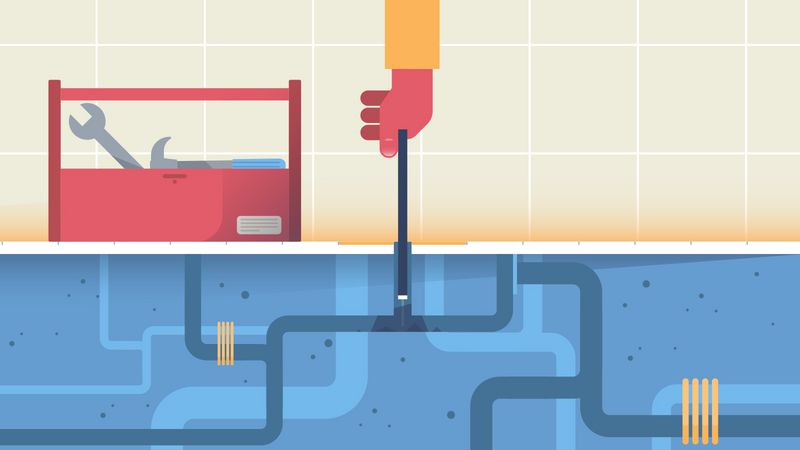
“Often a leaky tap happens because the seal is worn out,” says Mr Nikolova. “To replace it, turn off your central water supply. Then open the tap and let residual water pour out. Unscrew the handle and flange, and remove the tap bonnet and spindle. Check which part seems to be worn out. Is it the O ring, the washer or jumper? After this, you only have to replace the worn-out part and reassemble the tap by replacing the spindle, tap bonnet, flange and handle. To prolong the life of your taps, you can use a bit of waterproof lubricant.”
Mr Marr adds that sometimes leaks are a result of degraded silicone. “Remove all the silicone and head to your local DIY shop and pick up a silicone tube and gun,” he says. “Apply around the edges and then wet your finger and smooth off. Once complete, it should seal your sink or bath.”
If you’re talking blocked drains, don’t grimace. “Make sure you always have a drain-cleaning product in your house,” says Mr Oisin Hanrahan, co-founder of home services company Handy. “And once you fix that clogged pipe, it's wise to invest in a drain catcher, which will prevent it from getting blocked in the future."
Rewiring a plug

Electrics are daunting, mainly because there’s a risk of plugging yourself into the mains. But rewiring a plug is an entry-level skill you can master. “The first and most important thing is to learn the basic wire colours,” says Mr Nikolova. “The live brown or red wire connects to the right-hand live (L) terminal nearest to the fuse. The blue or black neutral wire connects to the left-hand neutral (N) terminal. The green and yellow earth wire connects to the central (E) terminal at the top.
“After stripping the insulation – when the appliance is disconnected, obviously – you should cut about 6mm of wire to wrap around the terminal screws, and about 13mm for clamp-type ones. Make sure you keep all strands of wire intact while you twist the strands of each wire together. Fit wires into the appropriate terminal hole and tighten the screw. Ensure that there are no stray nor bare wires.
“Finally, go through this checklist. One, wires are connected to the correct terminals. Two, there is no stray wire. Three, the flex clamp is on an outer sheath of cable, not on wire. Four, all screws are tight.”
Painting a wall

This is rarely as creative as you might imagine. The reality can be headaches and cramp in your forearm. Make your life easier by sanding back paintwork and cleaning walls thoroughly with sugar soap before you start, says Mr Marr. The sugar soap removes grime, grease and dirt from your surface, whereas detergents may react with the paint, making it easier to coat.
“Start by cutting in on the edges with a paintbrush,” says Mr Marr. “Use newspaper/old bed sheets/cardboard to keep the floor from getting covered in paint. Once you’ve cut in, you can use a roller to do the rest. Start with the ceiling, otherwise you'll end up with drips everywhere.”
“Don’t wash your brush between sessions,” says Mr Nikolova. “Instead, wrap it in plastic.” He also recommends soaking brushes in hot vinegar for about half an hour, so they loosen up. “Onion is known to absorb paint fumes,” he says. “Slice some and leave it in the room. Adding vanilla extract to the pot of paint can reduce the unpleasant scent of paint fumes. And cut a plastic bottle in half and attach it to your brush to avoid paint dripping on your hands.”
To avoid painting over screws and keyholes? “Use petroleum jelly to protect them from being accidentally painted,” says Mr Lee Wallender, who blogs at The Spruce. He also recommends putting masking tape around windows, so you don’t have to be careful where your brush splashes. “The masking tape does the work of creating lines,” he says. If you’re painting the window frame, put a masking tape border on the wall underneath the frame to limit the risk of splashing paint on the walls.
Workwear
Illustrations by Mr Fernando Volken Togni